Facebook Pinterest Twitter Bloglovin' Instagram Email Teachers Pay Teachers Image Map
Showing posts with label edtech. Show all posts

A New App for a New Year: Bloomz

In a moment that will surprise no one, I am back with another great app to share! 


I love technology. It's practically a sickness. I'm always on the hunt for an app that will make my life a little bit easier. Sometimes it backfires, though, when I end up with 15 apps to meet all my needs. Who has the storage for that? Not only that, who can remember it all and keep it all together? Definitely not me. I am super pumped I found an app that meets a few different needs and eliminates some of the excess. Best part? It's totally free. Bloomz is a sort of private social network that connects a teacher and the parents of students in his or her class. It's sort of like facebook, but way way better because parents of kids in your class can't creep on pictures posted by your college roommate. That can get ugly fast, people. 


With Bloomz, you can upload due dates and events into a class calendar, ask for volunteers, make a "wish list" of supplies, communicate with parents, and even send pictures. You can choose to send updates to one parent, a group of parents, or the whole class. Parents can then like, comment, or share on what you post. If you have an issue with a specific parent, you can even "mute" them so they can't post anything but they can still receive updates. This one app replaces google calendar, email, google drive, and even some paper notices. I am all about simplicity in 2016, people, so this app is definitely being implemented in my classroom.

Happy New Year! 


Making Research Reports Fun with Instagrok

I have spent a lot of time researching the Common Core research standards this year as part of a professional learning community. My PLC worked hard at finding ways to integrate the research, writing, and technology standards into our teaching. It's not easy, friends! I use PROBE notebooks as a yearlong research report project, but since that is written it doesn't address the "technology" portion of the fifth grade writing standards and the College and Career Readiness Anchor Standards. In my hunt for websites and apps, I found something really cool: instagrok


Instagrok seriously puts the "cool" back into research reports. It's super easy to use once you understand it! A "grok" is a visual concept map created for you based upon a search. It's pretty simple to get started- there a search bar, just like google, and you type in whatever you are doing research on. The concept map populates pretty quickly! Instagrok searches educational websites, pictures, and videos and puts together the best supporting concepts.

It's pretty, isn't it?? I love concept maps! Now, the real fun comes in. It's totally interactive. If you click on the video, it pops up a larger window and starts playing. If you click on the words, another window pops up with more details.


It's broken down into key facts, websites, videos, images, concepts, and notes. I have spent most of my time working with the kiddos in "key facts" but I think that as time goes on and they become more sophisticated in their research abilities I explore all the tabs with them. What a great way to teach them about determining importance! 

When you click on each fact, it brings up the source of the information so you can view it yourself. It also gives you a little text box on the bottom where you can add your own notes.


You can then "pin" the resource to your journal, which saves the information for later so you can refer back to it (and the notes you made) while writing your research report. I have to tell you a major downfall I found though- instagrok includes results from wikipedia. I address this by having my students mark them "not credible" and having them disregard that information. If there is a fact they really love, I ask them to find it from another source to use it. If it's a reliable fact, they will find it again!

One of my favorite things about instagrok is that you can customize the level of difficulty!

In the top task bar, there is a difficulty slider. Kiddos can self-select their level of difficulty, or you can assign it for them. This is SUPER helpful when trying to get some deep information and understanding for enrichment kids! I have put them up to "difficult" and then been amazed at some of the things they have researched and put together. They have examined some of the intricacies of their topics and really done a fantastic job. 


The grok stays really true to the topic, no matter the level that is assigned. At each one, the "meat" of the topic is really well represented. In the easy level, the student is introduced to the key components of the research topic. I like to think of it as the "quick and dirty" of the topic. They get the information they need without extra information to bog them down. This is great for kiddos that really have no prior knowledge on a difficult topic or for the students that struggle with retaining information. They get the knowledge they need, on their level, and are able to synthesize it into a written report. 


When the research is done, it's time to write the report! I don't know about you guys, but typically this is the part that my kiddos hate. I can't tell you how many times I have had kids that did spectacular research and then failed to put it together in a meaningful way- resulting in a lackluster project. I have to tell you- instagrok has really revolutionized the research report in this way! All the information that you have pinned as you looked through your grok is easily accessible on the sidebar. You can refer back to it as you write your report. When you finish, a bibliography is populated in the sidebar, as well. Best of all, you can export your sources to EasyBib and have a bibliography populated for you! I love doing this to teach my kiddos the correct way to cite sources. Let's be real- fifth graders are not always the most detail oriented, and little things like bibliographies sometimes slip through the cracks. I once had a student turn in a research report with "my brain" listed as a source... not even listed in proper MLA format! ;) 

Once the kiddos have finished their reports, they can email them as embedded text or print them. If you have assigned the project through your teacher account, the finalized report will show up in your teacher dashboard. The major downfall I see here is that you cannot save the file as a text document on your computer. Instead, I have had the file emailed to me and then I have copy/pasted it into Word. This is definitely not the fastest way to get things done, but it works for now. 

Instagrok is totally free to use as a student, and the "teacher" account is free for 90 days. Once your 90 day trial is up, it is $45 a year to keep the "teacher" services. I have to say, I won't be signing up for a paid account once my trial is up. For me, I love the student portion of the site (researching and writing) but found the teacher dashboard a bit clunky and hard to use. I like walking through the computer lab and working with the kiddos on the research as it happens. I don't think I use the paid version enough to justify buying it. I will definitely keep using instagrok to help my students address the CCSS research and technology standards, though! 

Plickers

Most of you know what a crazy busy year I have had. I had a baby, bought a fixer-upper to renovate, and my husband got a promotion that requires him to work longer hours. I am always looking for something to help me organize or track information in some way. Well, friends, enter Plickers.


I'm a technology addict, so I admittedly love a good bit of ed-tech in my classroom. Sometimes other teachers in my school aren't as interested in things I'm using because the technology is hard to manage. I've got to say, though, this ed-tech is SIMPLE and 100% free. It's a student response system that uses an app on your smartphone and some free printable response cards. Optionally, you can display the question via a projector to a screen or smartboard.

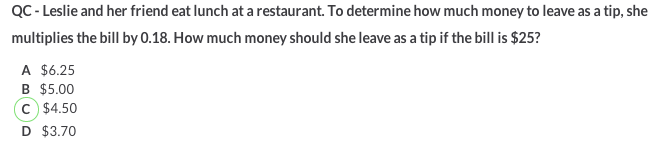
To use plickers, you have to enter questions into your library on their website. You can select a "correct" answer or just enter the responses to poll the students.


The screenshot above is from my account's "library" where I can assign the questions to my class. Once it is assigned, I can easily access it from the app. Select the class name, and click on the question you would like to ask. The question can be displayed on the projector as the class responds, as well.


Whatever question you select from the mobile app will show in the "live view" section of the website when you log in. More on that in a minute.

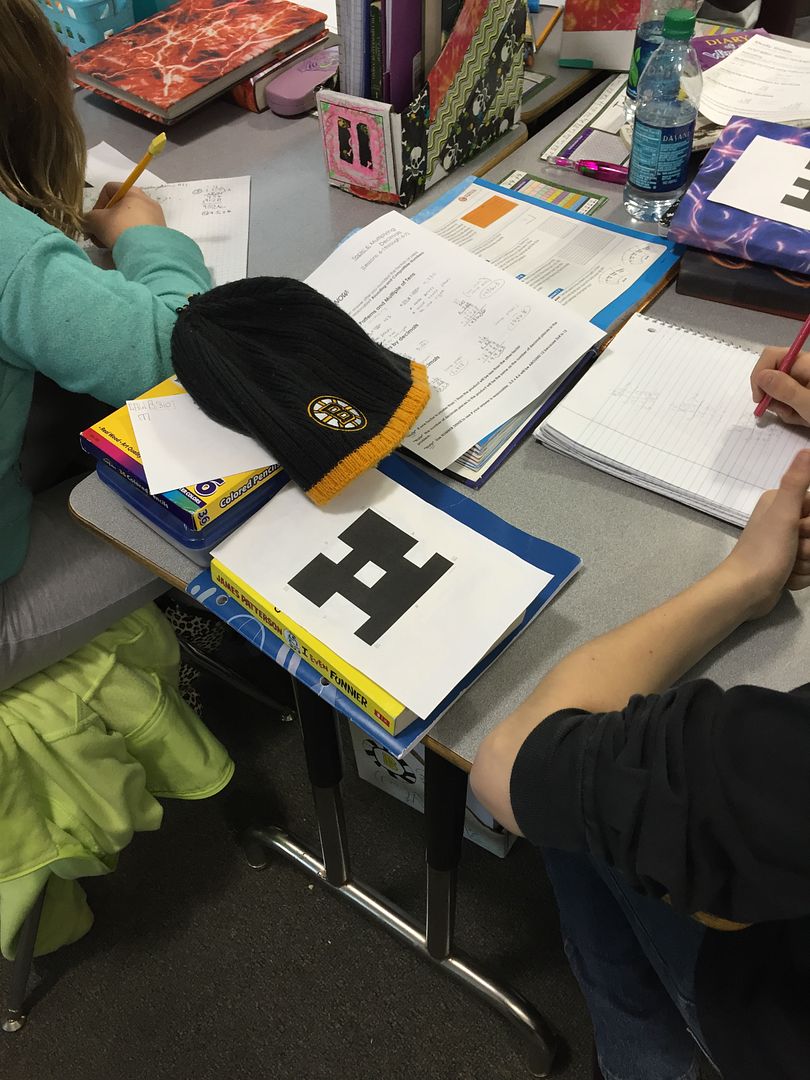
The standard student response cards are the size of half a sheet of paper, but larger ones are available. Each card displays the student number (this card is number 1) and has 4 choices for responses: A, B, C, D.  The kiddos select their answer and hold the card with that letter facing up. In the card above, the answer being selected is "B."  The letters are itty bitty and in a light font to ensure that kiddos can't copy each others answers, and that kids are not afraid to answer honestly. No one will know if they don't get it correct. 

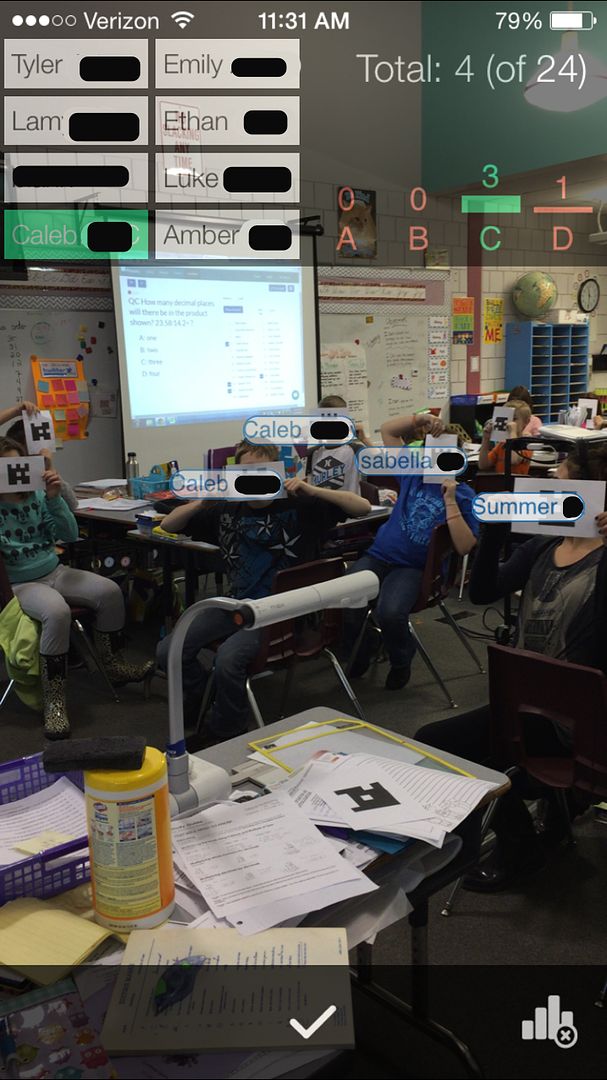
To record the responses, you open the app from your phone. Have the kiddos hold up their cards and scan the room with your phone. No need to walk around the room and scan them all up close- if you can see if, it will pick it up within a reasonable distance. In my classroom, which is fairly large, I am fine to stand at my spot and scan the room with the app. Once I start scanning, the student names highlight showing they have responded. If you are showing the liveview on the projector from the website, it shows what students have responded with a checkmark (without confirming their answer or if it was correct). I LOVE this because the kids can be sure that their answer was recorded! You can also optionally have their answers shown on the liveview, but that wasn't something I thought I'd use.


The app (screenshot above) also shows me which students have responded by highlighting them. It also shows the student response graph as we are working in real time. If a student responds correctly their name is highlighted in green, but if they respond incorrectly it is highlighted in red. This allows me to wander around the room and ask students to check their answers. It also begins building the student response graph in real time! You can see the breakdown of student responses as they come in.


After the students are finished responding, you can view the completed graph in the "reports" section of your online account. This is the graph of the student responses after I asked my kiddos if they liked plickers. I told them to be honest because we could stop using them if they weren't fans. This is just after one use, but so far the plickers are a win!


I printed the plickers on cardstock and have the kiddos keep them on their desks while they work. I have had a couple of my more organizationally challenged friends misplace them, and I think I am going to have the kids glue them inside their notebooks. You can't lose them, that way!

I've found a few different benefits to using these in my classroom. I often give quick checks to my students to check their progress. I like the immediate feedback that a 2 - 3 question assessment gives at the end of a lesson, or the beginning of the next day. I don't like to use these for grades, necessarily, but I do like to record progress. The plickers help me to see how the kiddos are doing and record their answers quickly without having to grade and record all those papers. LOVE this.

I also love the fact that they get the students excited to complete their work. They are itching for the opportunity to use their plickers! They are definitely excited to give their answers. I did find that this was a double edged sword, though. They were rushing and not checking their work to make sure they could answer the questions at the same time as everyone else. To solve this, I started giving worksheets with the "quick check" questions for the kiddos to answer. Once we are all done our work, we pull out the plickers and answer all the questions. 

I also like to do "polls" among my kiddos to see their thoughts on a topic, assess their feelings about their understandings, and quickly see how they performed on classwork or homework. We used to do "heads down, eyes closed votes" where I have each kiddo raise his or her hand at the appropriate time for how they feel or what their score was. It was kind of hectic copying down all their responses! Now, I can use the plickers and have it recorded for me. Talk about a time saver!

Seriously- I don't think I've found a 100% free with no option to pay more for something extra app that has been loved by both me and my kiddos before EVER. You can tell I mean it because I used italics, capital letters, and underlining in that sentence. It's that serious. You can learn more and sign up for a free account on their website


Integrating technology into ELA instruction

Over the past couple of months, I have been working to increase the amount of technology I integrate into my instruction. I have always loved ed-tech, but I have struggled with ways to incorporate it within levelized reading instruction. Well, I think I've found the answer...


Newsela has been a bit of a hero for me. As a teacher, you sign up for an account. With your account, you then set up a class for your students. Each kiddo gets his own logon information, and you are able to assign articles to your students. Here's where it gets really good.


Each article is available at 5 different lexile levels. The text becomes more or less complex depending on the level you choose! You can assign levels, and the kids can adjust them as needed. If a student is really struggling with a text, he can hit the minus button in the blue task bar to lower the level. If they are zooming through it, they can level up with the plus sign. 

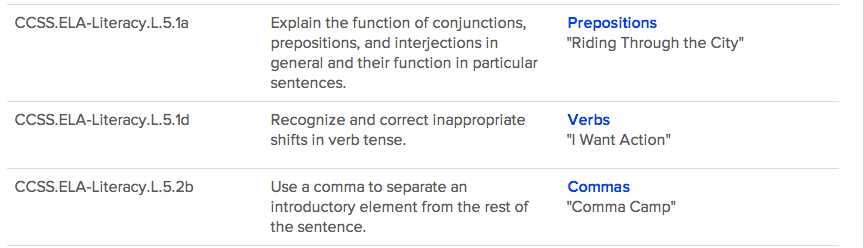
Most articles have a quiz associated with this addressing targeted anchor stardards. You can identify the anchor standards by hovering over the lightbulb icon at the top of the article.


The tests are automatically differentiated depending on the lexile level of the article, while still addressing the same common standard.


Seriously- just going to let that sink in.  Automatically differentiated.

....


....

AUTOMATICALLY DIFFERENTIATED! I love this. I can't get enough of it. The needs of all students are met with similar articles and questions. We can still have class discussions about the topic, because they all learned about the same thing! All of this with really minimal teacher prep.  

You can even annotate the text with (or for) the students.


There is no special tool- just use your cursor to highlight the text, and the colors and annotate field pop up. 

You can track progress through your teacher account. It will show the student progress through quizzes, scores, and article lexile level.


I haven't used mine enough to have significant progress in my students, so this is the generic sample from the website. We definitely are not at 1223 quizzes taken! :)

I've used it a few times with my students and they have really enjoyed it. They get to use the coveted iPads, and I get to track their progress with differentiated material. The articles are non-fiction to address the common core non-fiction requirements, and also based in current events to increase student engagement. Best of all- it's free!  Check it out. 


Don't forget to enter the pencil sharpener giveaway! 


You can enter until Monday, 11/10. The runner up prize is a $10 gift card to the store of your choice!

Flocabulary


Have you heard of Flocabulary? If you haven't, then listen up because it's pretty amazing. It's an online library full of educational hip-hop songs tailored to engage students while teaching them the important concepts. The videos reach into every content area: math, ELA, social studies science, government, history, life skills, and current events.


There is even an entire section called the Word Up Project The videos incorporate music, rhythm, and rhyme in order to address the unique needs of all students. The vocabulary section is broken down by grade, and addresses grades K - 8, and SAT vocabulary.


The Word Up Project targets interdisciplinary tier 2 academic words, which will help to improve reading skills and deepen the understanding of the content. They provide a master word list, a compilation of lesson plans, and several different suggested teaching schedules.

No matter what subject you choose, there are tons of printable activities, including lyrics, fill in the blanks, exercises (which make great homework packets!), and even a test and answer key.


Best of all - the videos address the common core standards. They even have a standards alignment tool that matches videos up with the standards they address! If you are looking to address a specific standard, you can go to the tool find videos to help you.


Seriously, I'm a Flocab addict. I love the depth and quality of the lessons, and the results the kids are giving. My students love the rap and accompanying video. It's a pretty great match. There is a free trial- give it a shot with your kiddos!
Related Posts Plugin for WordPress, Blogger...
Jasper Roberts Consulting - Widget